In which I reveal my recipe for creating storm masks!
I’ve enjoyed painting for as long as I can remember. In high school, I produced a 6-foot-tall depiction of the 1980 Roseville, Minnesota tornado for a mural depicting the history of the city. (With no images of the actual tornado at my disposal, I settled for a frame from a film of a 1960s Salina, Kansas tornado instead.)
Becoming a “professor mommy” meant my painting had to take a backseat to child care and academic responsibilities for several years. I would occasionally carve out two hours to take a painting class at our local wine-and-canvas franchise. During the pandemic, however, even that creative outlet was unavailable to me.
Hunting for groceries one July afternoon at Meijer, I spied a palette load of white cotton face masks. An LED bulb lit up somewhere in my addled brain – canvases are also made from cotton, so why can’t cotton masks be canvases? I immediately resolved to set these masks up on a date with my art supplies.
After washing and de-linting that first 10-pack, I painted my first storm mask – based on the famed and infinitely reproduced image of the 3 May 1999 Moore, Oklahoma tornado snapped by Daphne (then Zaras) Ladue – using acrylic paints that I had on hand. A tweet of my creation quickly garnered many positive reactions.
Several more followed:
I quickly learned that acrylic paint isn’t the best for mask painting, because it likes to layer on a canvas rather than soaking in. I’m accustomed to layering images from darkest shades to lightest, sometimes slathering on many layers since acrylic paint is opaque. If the paint layers are too thick, the mask will be stiff and not admit ventilation as easily. Plus, well, it smells like acrylic paint. Yuck.
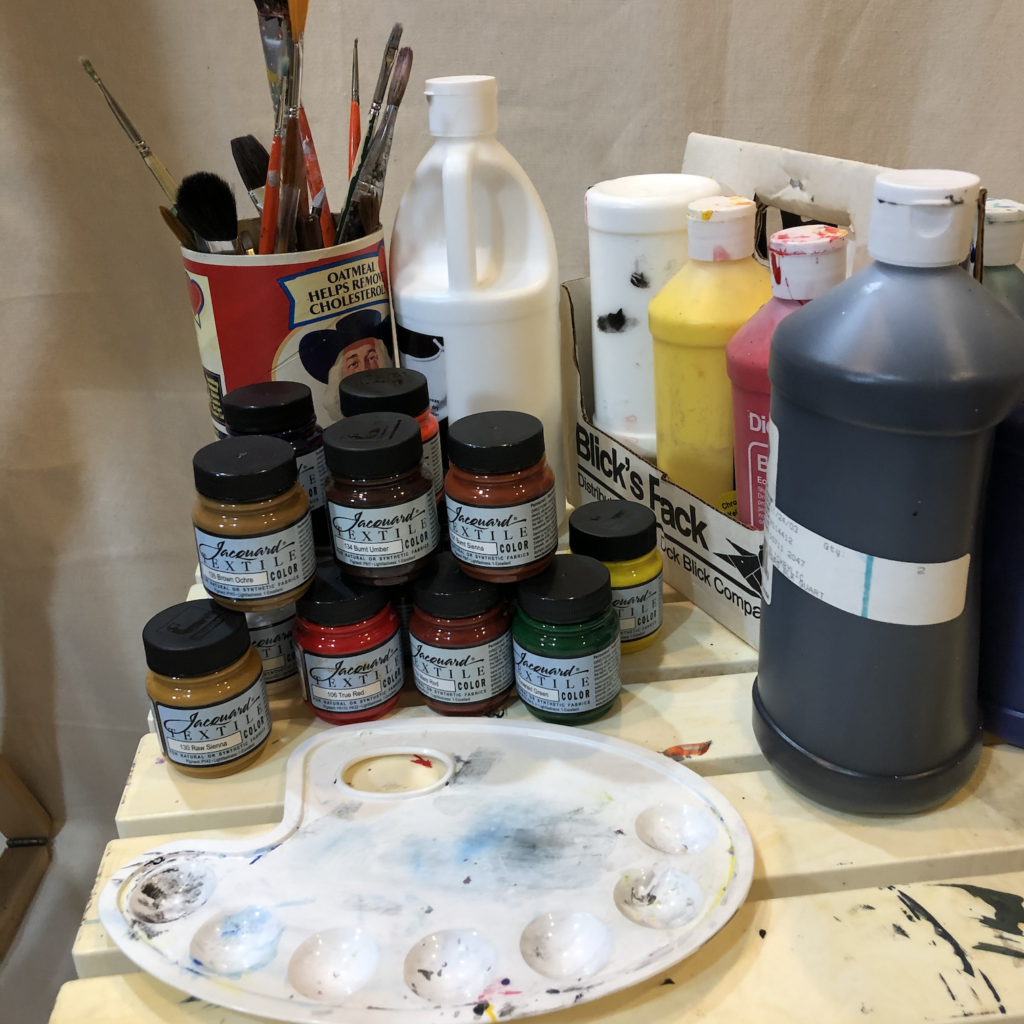
So, I switched to textile paints, which are thinner. Dick Blick sells a couple variety packs of basic colors in 2.25-oz jars. I particularly like the “natural” colored ones, as it contains a variety of colors necessary to paint foreground scenery like bare soil, scrub, grass, and trees. (If you don’t have the budget to acquire completely new paint, acrylic paint can be thinned with a tiny amount of water. It’s just a bit of a pain to do it for every color.)
The tweet above is my first use of the hashtag #stormmask.
I’ve traded a few such masks for storm video and given others as gifts. It’s been suggested that I should sell these masks on Etsy or similar. While the idea is intriguing, I simply don’t have the time to start a side hustle between my professorial duties and my two kids (both of whom are in and out of COVID lockdown periodically). So, in the spirit of sharing, here, step by step, is my “recipe” for a storm mask.
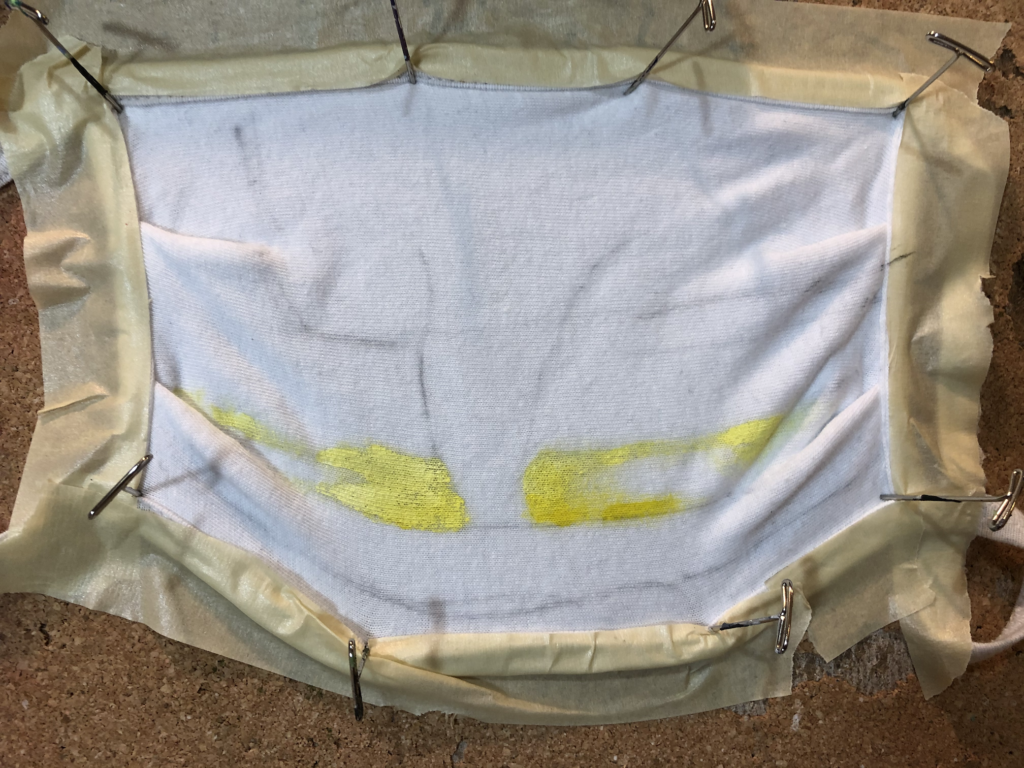
First, wash and delint the mask. Pin the mask to a cork board, stretching it as taut as possible. If desired, use, well, masking tape to mask the parts of the mask that you don’t want to paint.
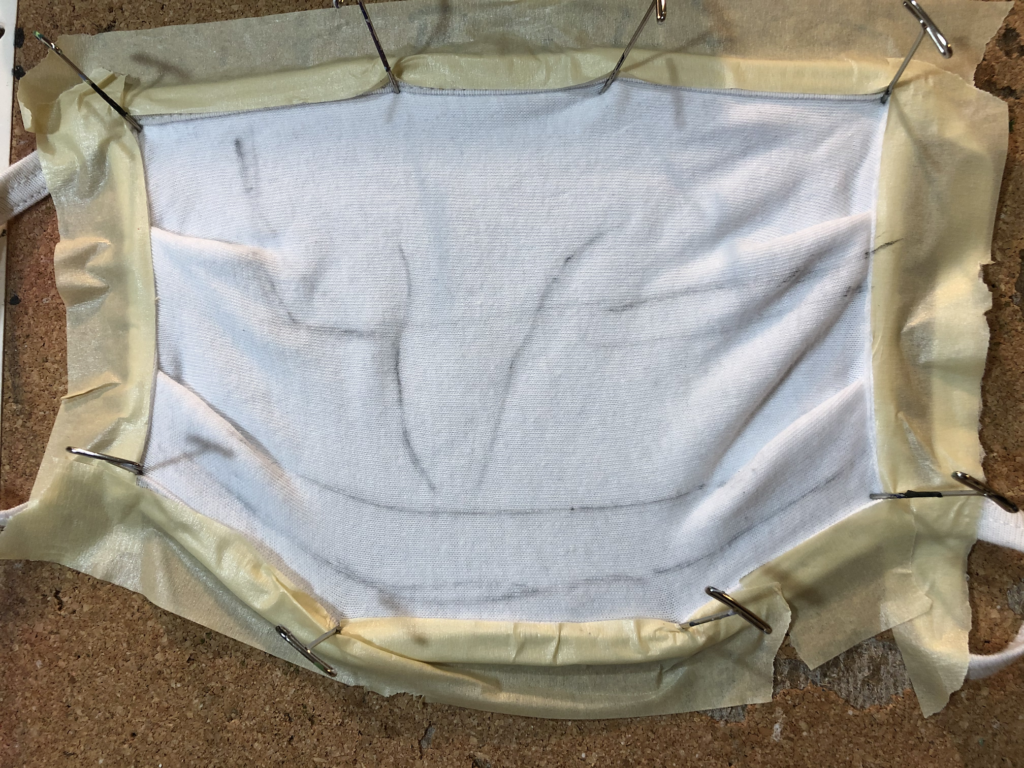
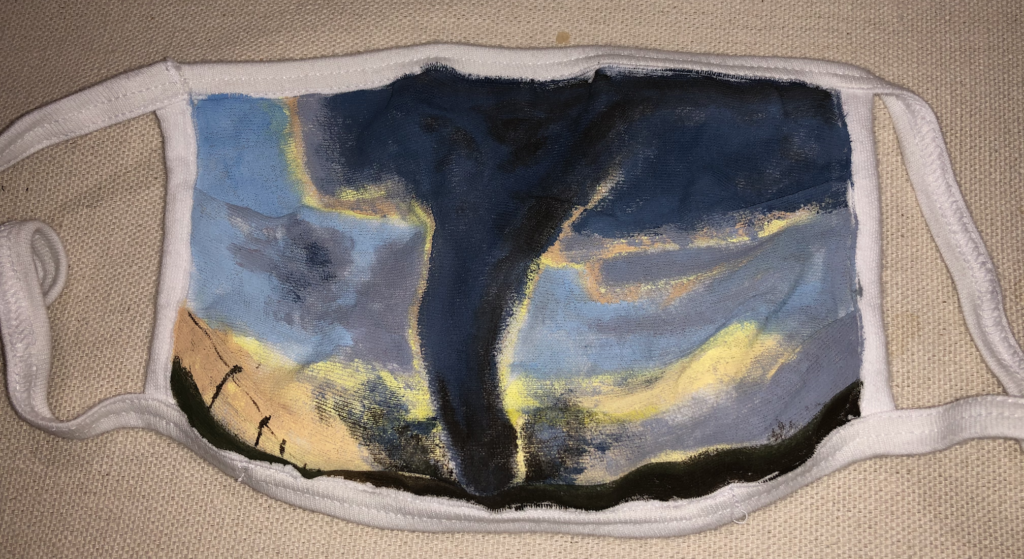
Choose a source image. (Here’s the one I used for this mask: a tornado photo from Darin Brunin.) Sketch the basic outline on the mask using a light pencil or charcoal. Don’t focus on details at this point; just focus on proportions and strong color and lighting gradients.
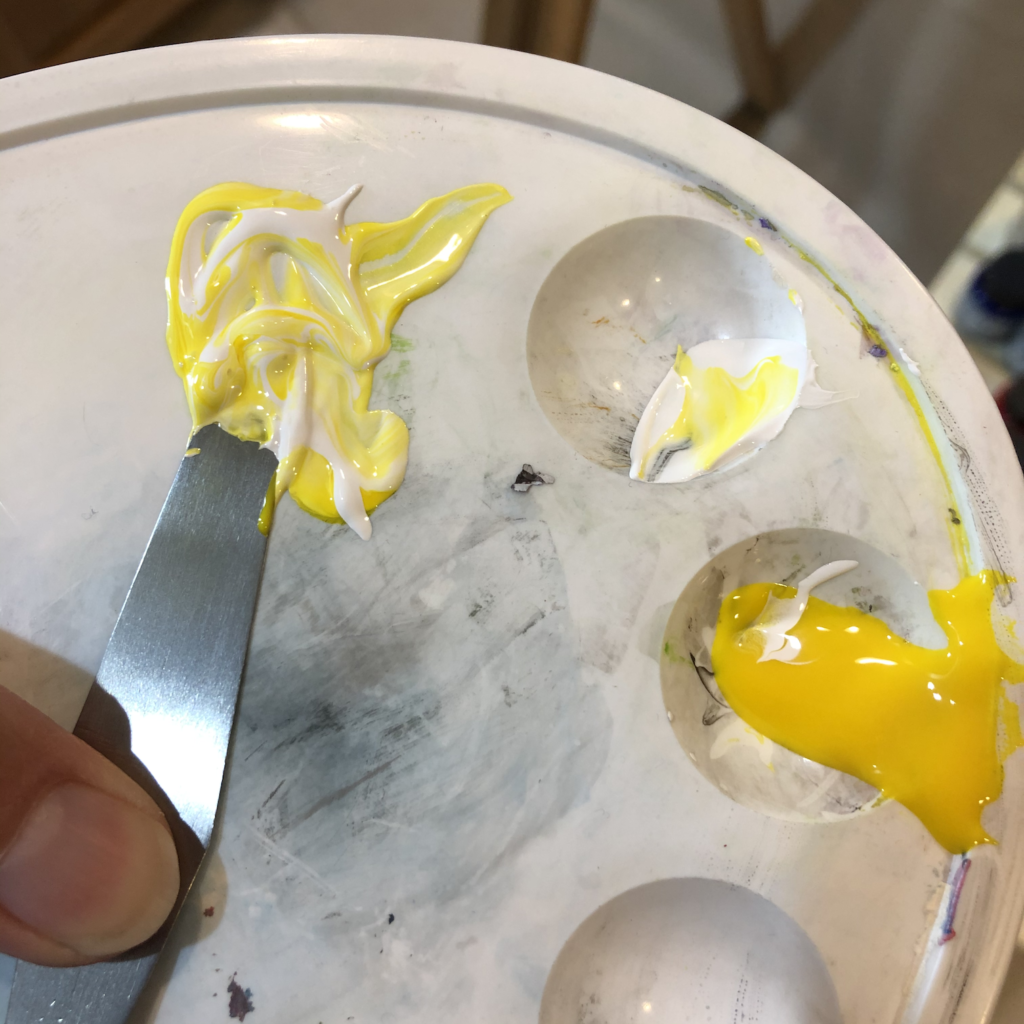
In opposition to how I paint with acrylics, I paint textile paints starting from the lightest colors and proceeding to the darkest. Those of you who work with watercolors will understand. These light regions are usually sunlit areas and the whites of clouds.
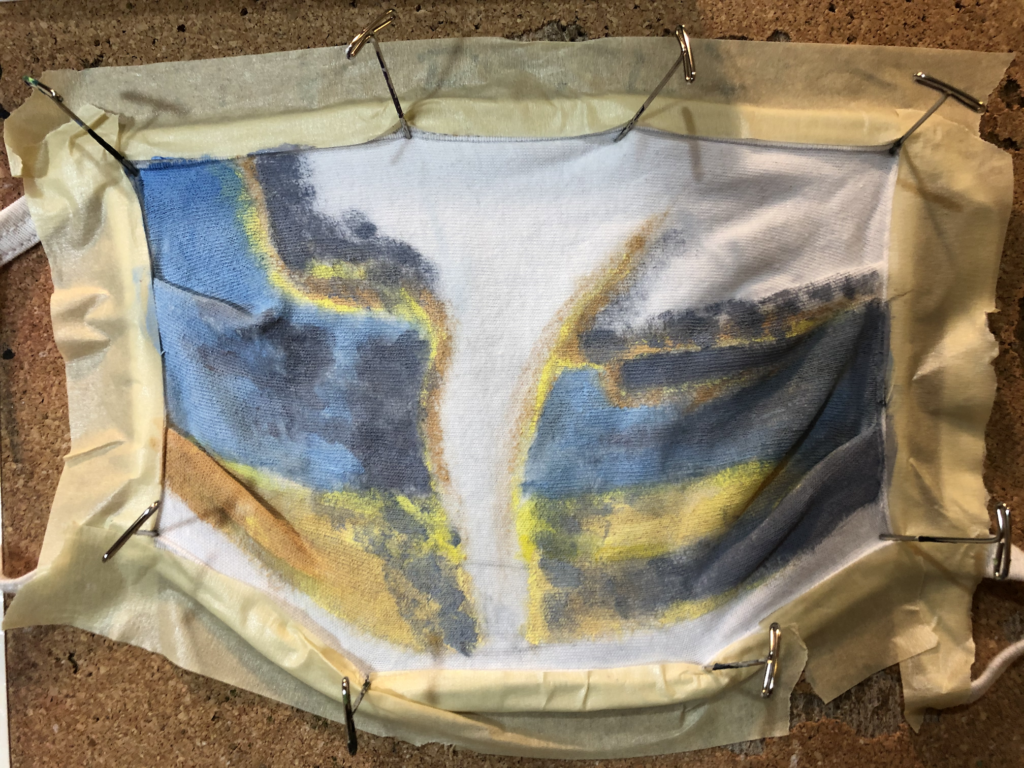
Plan for pleats. Many storm photographers shoot using the rule of thirds. As it happens, the masks I paint have two pleats that separate the paintable area into thirds. If you sketch your design out well, you can make the pleats work with the picture by aligning the landscape with the bottom pleat and the cloud base with the top pleat.
I paint the foreground last, mostly because it usually requires darker colors and more attention to details like leaves, fence posts, and telephone poles. You could omit these items, of course, but I like to leave them in if they aren’t too intrusive, because they add an element of mystique to the picture.
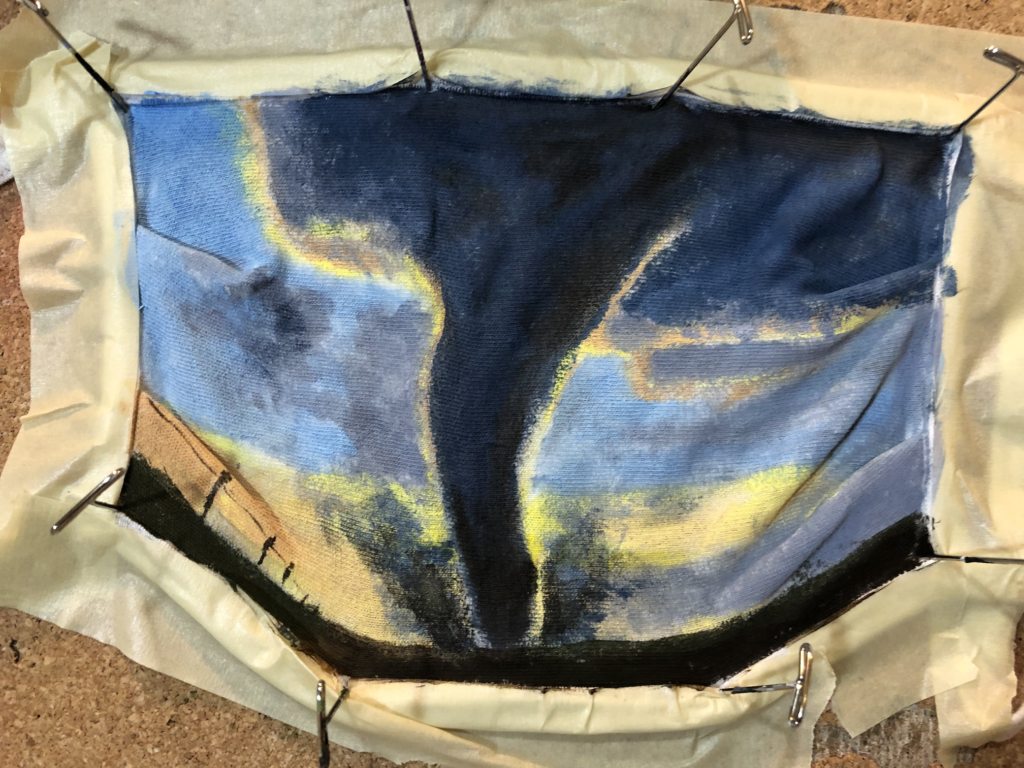
Let the mask dry overnight, then remove the pins so that the fabric doesn’t become permanently stretched out. Don’t be that person with the mask sagging down below their nose. The result should look something like the image at the top of this article.
You can wear the mask at this point, but I’d actually avoid trying to launder it for a few more days, and perhaps as long as a week. Fabric paint is more like dye, and prone to bleeding in hot water if it isn’t completely dry. I presume you don’t want to end up with tornado-shaped spots on your other garments.
Some other miscellaneous tips:
Brushes: I use medium-size brushes for sky, and small, pointed brushes for details. Since masks are small, there’s not much room for error. I’ve redone an entire mask after using too thick of a brush and ending up with a fat cactus-like glob rather than a telephone pole.
If painting a tornado, place the tornado slightly off-center. This practice avoids the appearance of an elephant trunk (not the tornadic kind) on your face when you finally don the mask.
To make the colors last multiple washings, use a mild detergent, like Woolite, and wash them on the delicate cycle. Dry the mask on low or medium heat; high heat may cause the mask to curl up or stiffen.
Lastly, have fun making your own masks! Don’t be afraid to make mistakes – learn from them and paint on! If I really screw up a design, I can easily redo it on the other side.
I find painting storm masks therapeutic – a workout for my right brain after I pummel my left brain with my intellectual pursuit du jour. Unlike large canvases that can take me weeks to complete, I can usually crank out a storm mask in about 30 to 45 minutes. Talk about instant gratification!
I hope this inspires you. Good luck! I’d love to see what you come up with; please tag me on Twitter!